
springboot整合mybatis
1、创建普通springboot项目
2、引入依赖
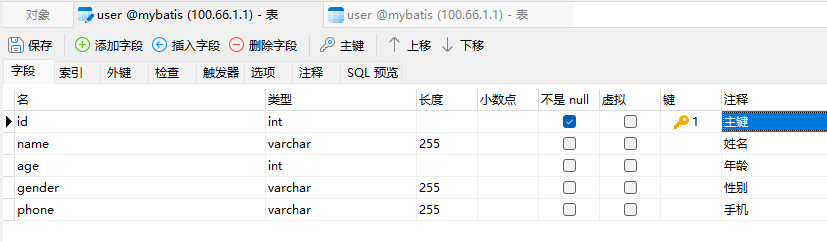
3、创建实体类
4、创建3层结构
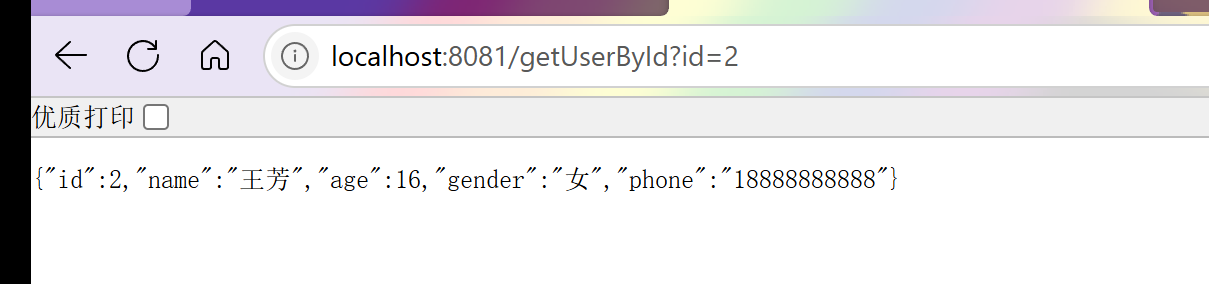
5、调用接口
1、创建普通springboot项目
用springboot的启动器创建,组件勾选spring-web组件
2、引入依赖
还需要映入3个依赖,分别是mybatis的springboot启动器,mysql的驱动,和lombok方便创建实体类。
<dependencies>

    <!--    mysql驱动依赖    -->
    <dependency>
        <groupId>com.mysql</groupId>
        <artifactId>mysql-connector-j</artifactId>
    </dependency>

    <!--    mybatis启动器依赖    -->
    <dependency>
        <groupId>org.mybatis.spring.boot</groupId>
        <artifactId>mybatis-spring-boot-starter</artifactId>
        <version>3.0.3</version>
    </dependency>

    <dependency>
        <groupId>org.projectlombok</groupId>
        <artifactId>lombok</artifactId>
        <version>1.18.26</version>
    </dependency>

    <!--    springboot启动器依赖    -->
    <dependency>
        <groupId>org.springframework.boot</groupId>
        <artifactId>spring-boot-starter-web</artifactId>
    </dependency>

    <dependency>
        <groupId>org.springframework.boot</groupId>
        <artifactId>spring-boot-starter-test</artifactId>
        <scope>test</scope>
    </dependency>
</dependencies>
3、创建实体类
注意和数据库的保持一致
实体类:
import lombok.AllArgsConstructor;
import lombok.Data;
import lombok.NoArgsConstructor;

@Data
@AllArgsConstructor
@NoArgsConstructor
public class User {
    private Integer id;
    private String name;
    private Integer age;
    private String gender;
    private String phone;
}
4、创建3层结构
分别创建mapper,service,controller.
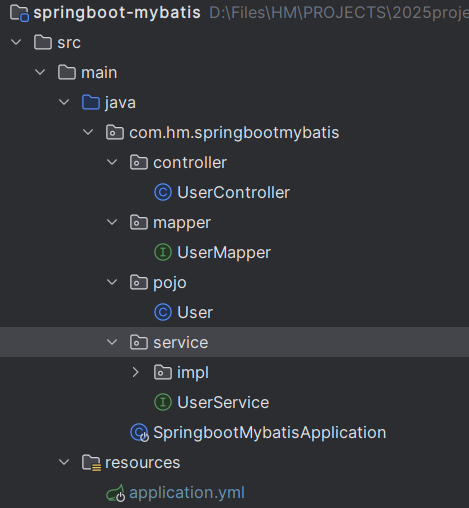
先创建mapper:springboot-mybatis/src/main/java/com/hm/springbootmybatis/mapper/UserMapper.java
import com.hm.springbootmybatis.pojo.User;
import org.apache.ibatis.annotations.Mapper;
import org.apache.ibatis.annotations.Select;

@Mapper
public interface UserMapper {
    @Select("select * from user where id = #{id}")
    public User getUserById(Integer id);
}
在创建service和他的实现
springboot-mybatis/src/main/java/com/hm/springbootmybatis/service/UserService.java
import com.hm.springbootmybatis.pojo.User;

public interface UserService {
    public User  getUserById(Integer id);
}
springboot-mybatis/src/main/java/com/hm/springbootmybatis/service/impl/UserServiceImpl.java
import com.hm.springbootmybatis.mapper.UserMapper;
import com.hm.springbootmybatis.pojo.User;
import com.hm.springbootmybatis.service.UserService;
import jakarta.annotation.Resource;
import org.springframework.beans.factory.annotation.Autowired;
import org.springframework.stereotype.Service;

@Service
public class UserServiceImpl implements UserService {

    @Resource
    private UserMapper userMapper;

    @Override
    public User getUserById(Integer id) {
        return userMapper.getUserById(id);
    }
}
再创建controller:springboot-mybatis/src/main/java/com/hm/springbootmybatis/controller/UserController.java
import com.hm.springbootmybatis.pojo.User;
import com.hm.springbootmybatis.service.UserService;
import jakarta.annotation.Resource;
import org.springframework.web.bind.annotation.RequestMapping;
import org.springframework.web.bind.annotation.RestController;

@RestController
public class UserController {

    @Resource
    private UserService userService;

    /**
     * 根据用户ID获取用户信息
     *
     * @param id 用户ID,用于查询特定用户信息
     * @return 返回用户对象,如果找不到则返回null
     */
    @RequestMapping("/getUserById")
    public User getUserById(Integer id)
    {
        // 打印查询的用户ID,用于调试和日志记录
        System.out.println("id:"+id);

        // 调用用户服务中的获取用户方法,传入用户ID
        // 这里依赖于userService,具体的业务逻辑在服务层实现
        return userService.getUserById(id);
    }


    @RequestMapping("/hello")
    public String hello()
    {
        System.out.println("hello world");
        return "hello world";
    }
}
5、调用接口
测试接口调用情况
本文是原创文章,采用 CC BY-NC-ND 4.0 协议,完整转载请注明来自 山山
阅读建议

评论
匿名评论
隐私政策
你无需删除空行,直接评论以获取最佳展示效果